로봇/ROS
URDF를 이용해 만든 로봇에 Unity 자동차 연결하기 (3)
with-RL
2023. 8. 15. 17:31
이번 포스팅은 URDF를 이용해 만든 로봇에 Unity 자동차 연결하기 (2) 과정을 통해서 만들어진 로봇을 Unity 로봇을 ROS와 연동하고 제어해 보는 과정입니다.
이 포스트는 다음 과정을 완료한 후에 참고하시길 바랍니다.
- URDF를 이용한 간단한 로봇 만들기 (1)
- URDF를 이용한 간단한 로봇 만들기 (2)
- URDF를 이용한 간단한 로봇 만들기 (3)
- URDF를 이용해 만든 로봇에 가상 자동차 연결하기 (1)
- URDF를 이용해 만든 로봇에 가상 자동차 연결하기 (2)
- URDF를 이용해 만든 로봇에 Unity 자동차 연결하기 (1)
- URDF를 이용해 만든 로봇에 Unity 자동차 연결하기 (2)
1. Unity - ROS 연동하기 (Unity)
- Unity 메뉴에서 'Window >> Package Manager'를 선택합니다.

- 'Package Manager' 창에서 '+' 버튼을 누른 후 'Add package from git URL...'을 선택합니다.
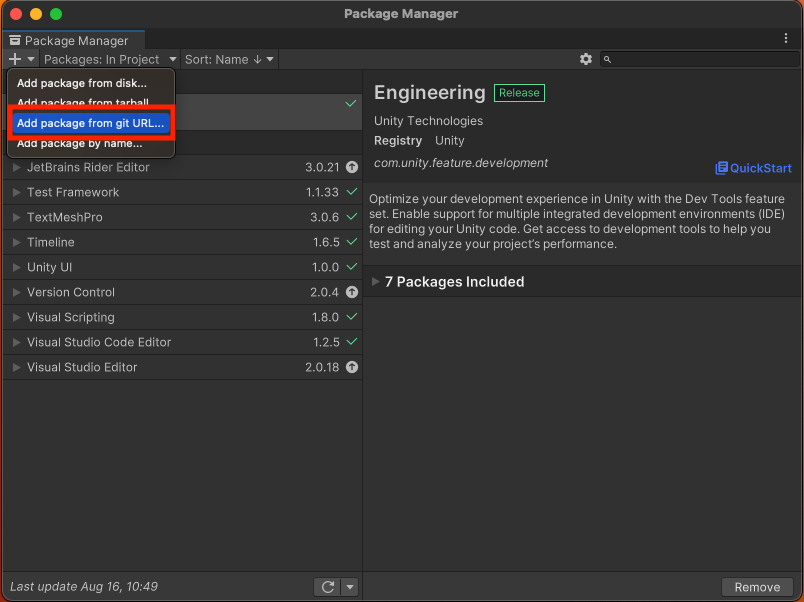
- 다음 URL을 각각 입력하고 'Add' 버튼을 눌러서 설치합니다.
◦ https://github.com/Unity-Technologies/ROS-TCP-Connector.git?path=/com.unity.robotics.ros-tcp-connector
◦ https://github.com/Unity-Technologies/ROS-TCP-Connector.git?path=/com.unity.robotics.visualizations
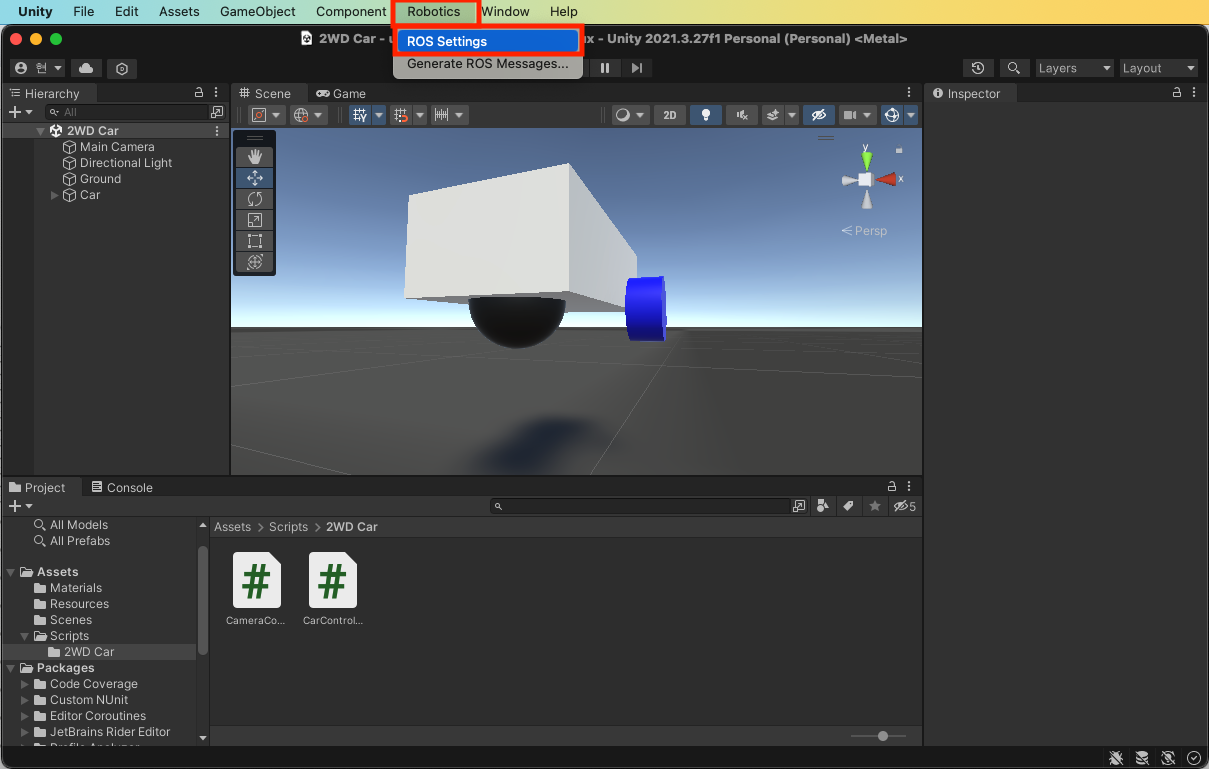
- 위의 Package를 설치하고 나면 아래와 같이 Unity 메뉴에 'Robotics'라는 메뉴가 생깁니다. 'Robotics >> ROS Settings'를 선택합니다.
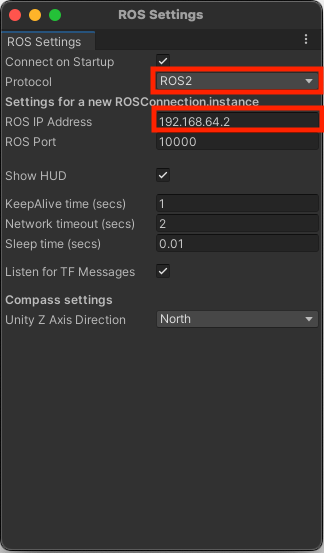
- 'ROS Setting'창에서 아래 내용을 설정합니다.
◦ Protocol: ROS2
◦ ROS IP Address: <ROS 2 Server IP Address>
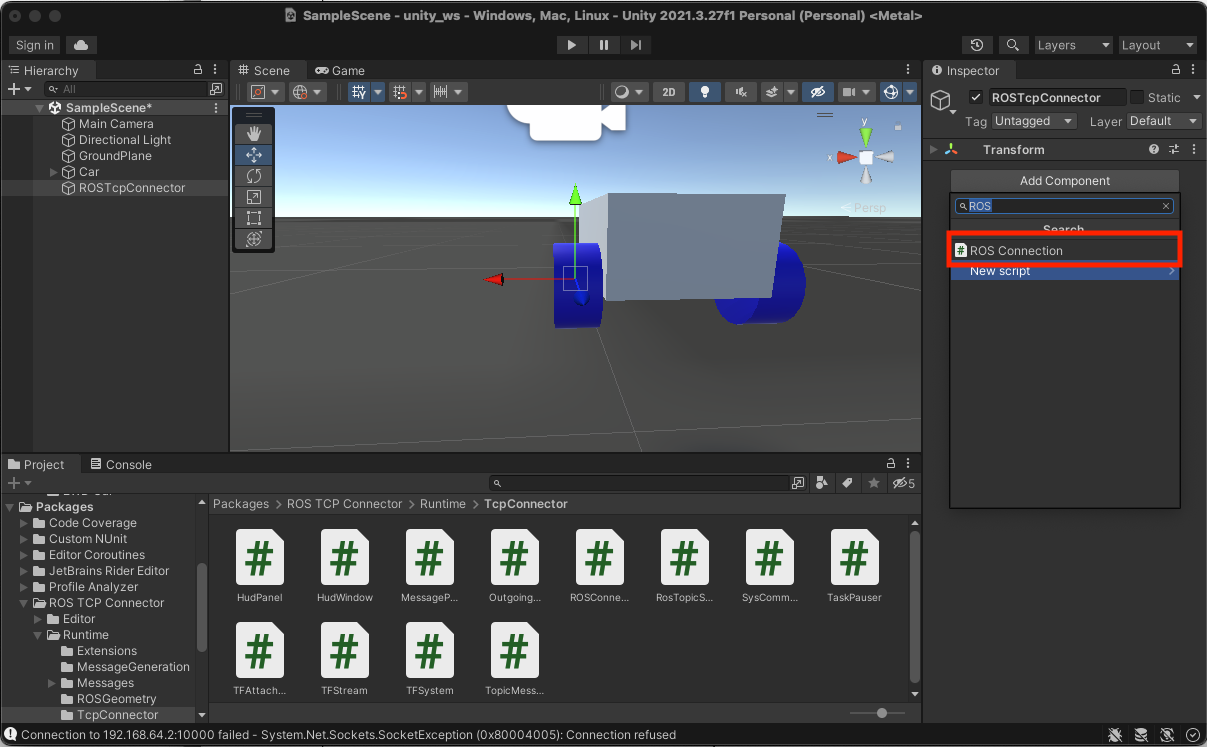
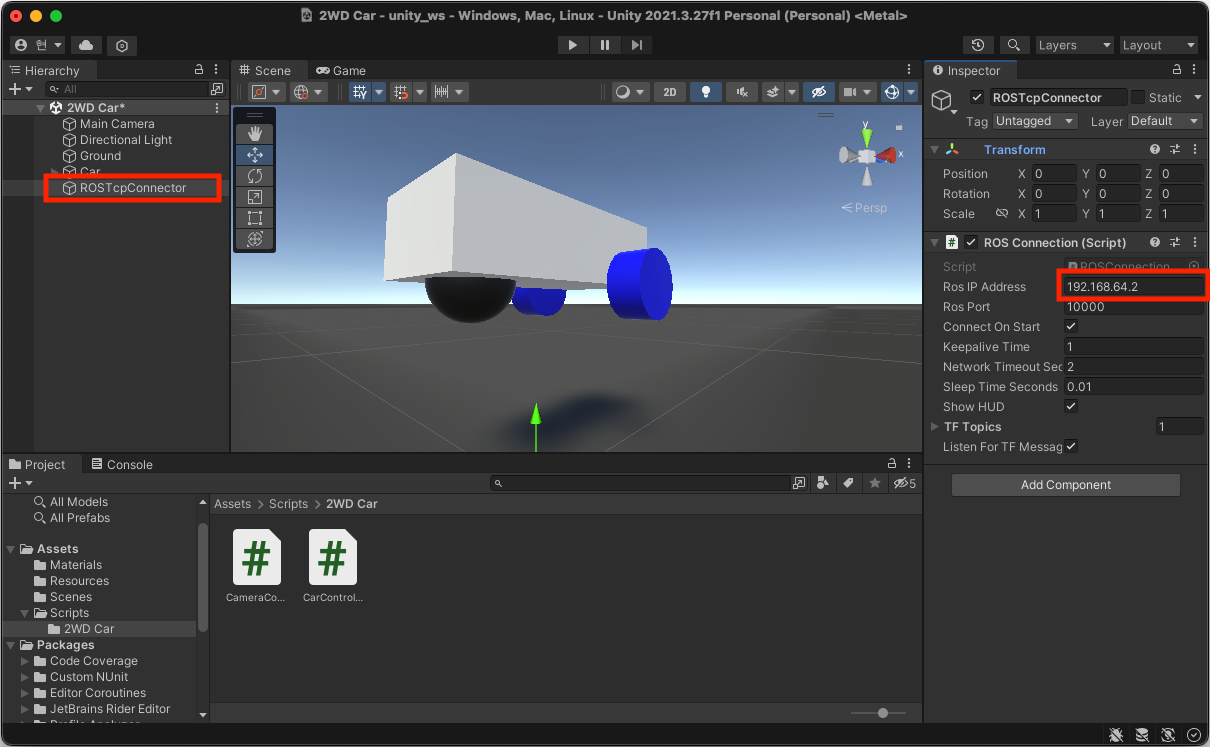
- 'Empty GameObject'를 생성하고 아래와 같이 설정합니다.
◦ Name: ROSTcpConnector
◦ 'ROS Connection Script' 추가
- ROS IP Address: <ROS 2 Server IP Address>
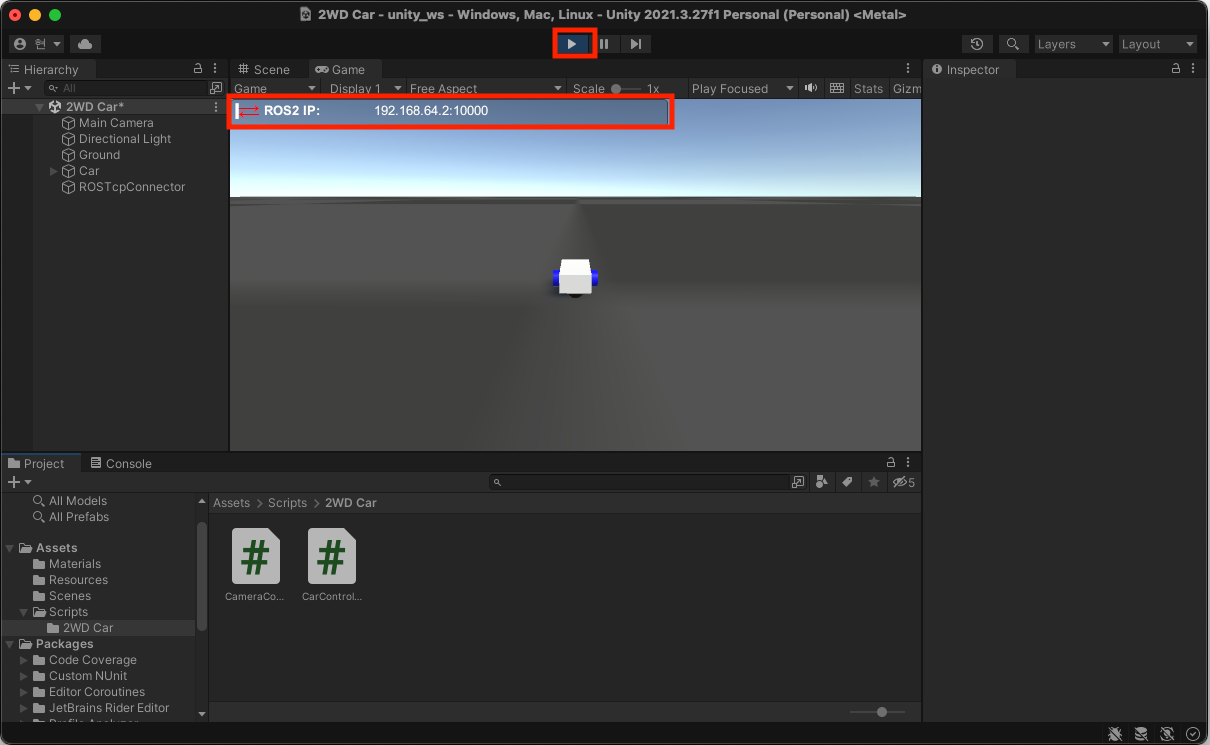
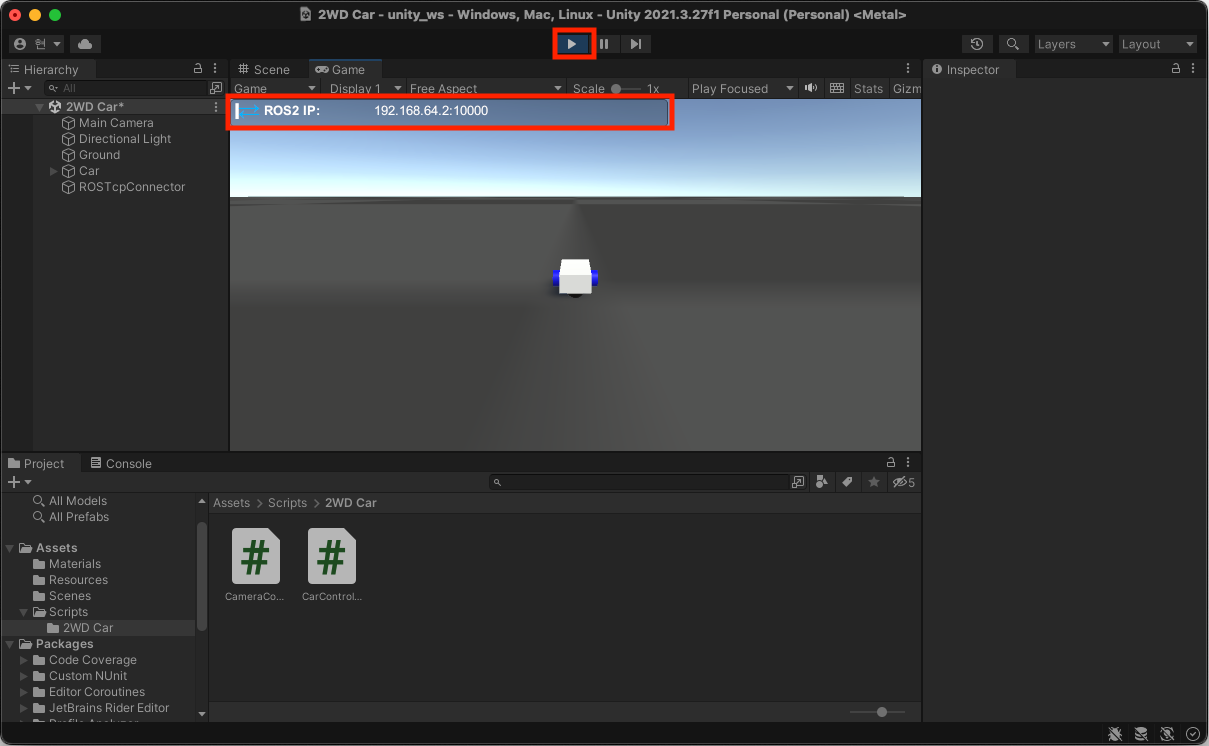
- Unity에서 Play 버튼을 눌러서 실행하면 아래와 같이 빨간색 아이콘과 ROS2 연결정보가 출력됩니다. 여기서 빨간색이 아이콘이 나타나는 이유는 ROS2 서버 설정이 안 돼있기 때문에 연결에 실패해서입니다.
2. Unity - ROS 연동하기 (ROS)
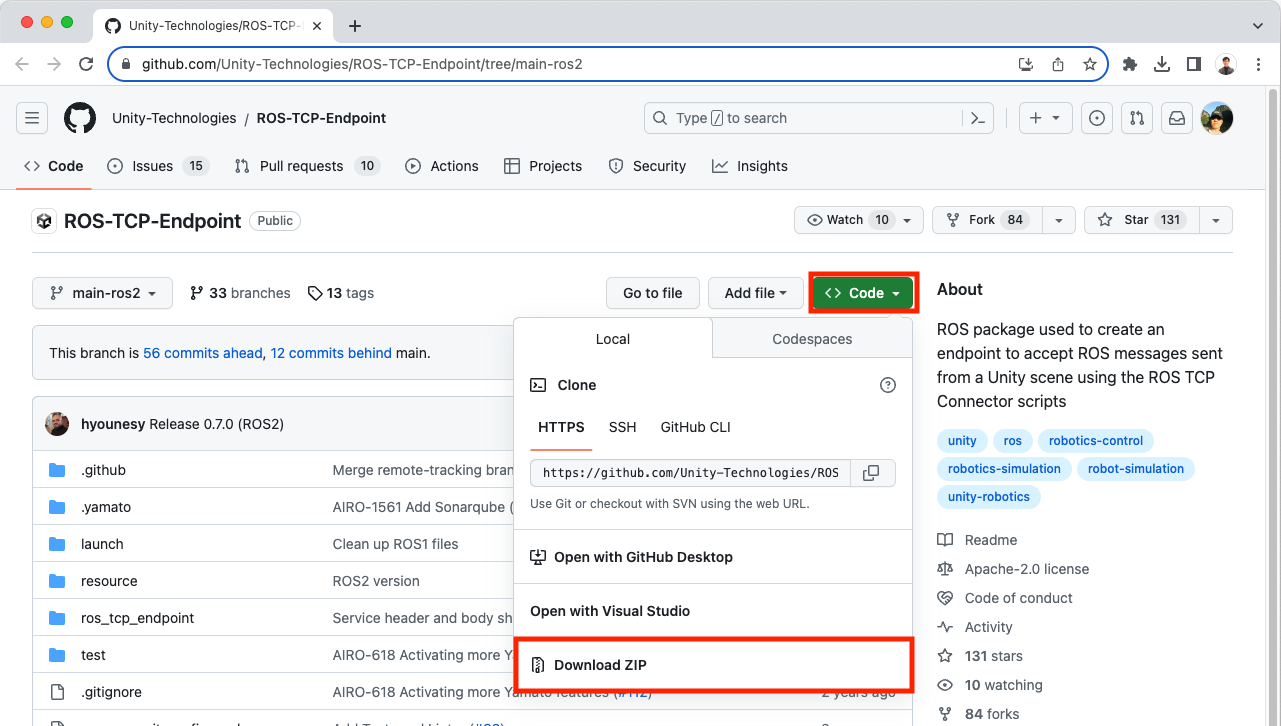
- 브라우저에서 https://github.com/Unity-Technologies/ROS-TCP-Endpoint/tree/main-ros2에 접속 후 'Code'를 누르고 나나는 팝업에서 'Download ZIP'을 선택해서 'ROS-TCP-Endpoint' Package를 다운로드합니다.
- 다운로드된 ROS-TCP-Endpoint-main-ros2.zip 파일을 ~/Workspace/ros_ws/src 폴더에 위치하도록 한 후 아래 명령을 실행합니다.
$ cd ~/Workspace/ros_ws/src
$ unzip ROS-TCP-Endpoint-main-ros2.zip
$ mv ROS-TCP-Endpoint-main-ros2/ ros_tcp_endpoint
$ rm ROS-TCP-Endpoint-main-ros2.zip- 'src/car_tutorial/launch/unity.launch.py' 파일을 생성하고 아래와 같이 편집합니다. 아래 코드에 실행되는 Node 중 ros_tcp_endpoint가 포함된 것을 확인할 수 있습니다.
import os
from ament_index_python.packages import get_package_share_directory
from launch import LaunchDescription
from launch_ros.actions import Node
import xacro

def generate_launch_description():
    package_name = 'car_tutorial'

    # robot_state_publisher
    pkg_path = os.path.join(get_package_share_directory(package_name))
    xacro_file = os.path.join(pkg_path, 'urdf', 'car.xacro')
    robot_description = xacro.process_file(xacro_file)
    params = {'robot_description': robot_description.toxml(), 'use_sim_time': False}

    rsp = Node(
        package='robot_state_publisher',
        executable='robot_state_publisher',
        output='screen',
        parameters=[params],
    )

    # ros tcp endpoint
    ros_tcp_endpoint = Node(
        package='ros_tcp_endpoint',
        executable='default_server_endpoint',
        output='screen',
        parameters=[],
    )

    # odometry publisher
    odometry_publisher = Node(
        package='car_odom',
        executable='car_odom',
        output='screen',
        parameters=[],
    )

    # rviz2
    rviz = Node(
        package='rviz2',
        executable='rviz2',
        name='rviz2',
        output='screen',
        arguments=['-d', 'src/car_tutorial/config/car.rviz'],
    )

    return LaunchDescription(
        [
            rsp,
            ros_tcp_endpoint,
            odometry_publisher,
            rviz,
        ]
)- 터미널에서 아래 명령을 실행해서 'unity.launch.py'를 실행합니다.
$ cd ~/Workspace/ros_ws
$ colcon build --symlink-install
$ source install/setup.bash
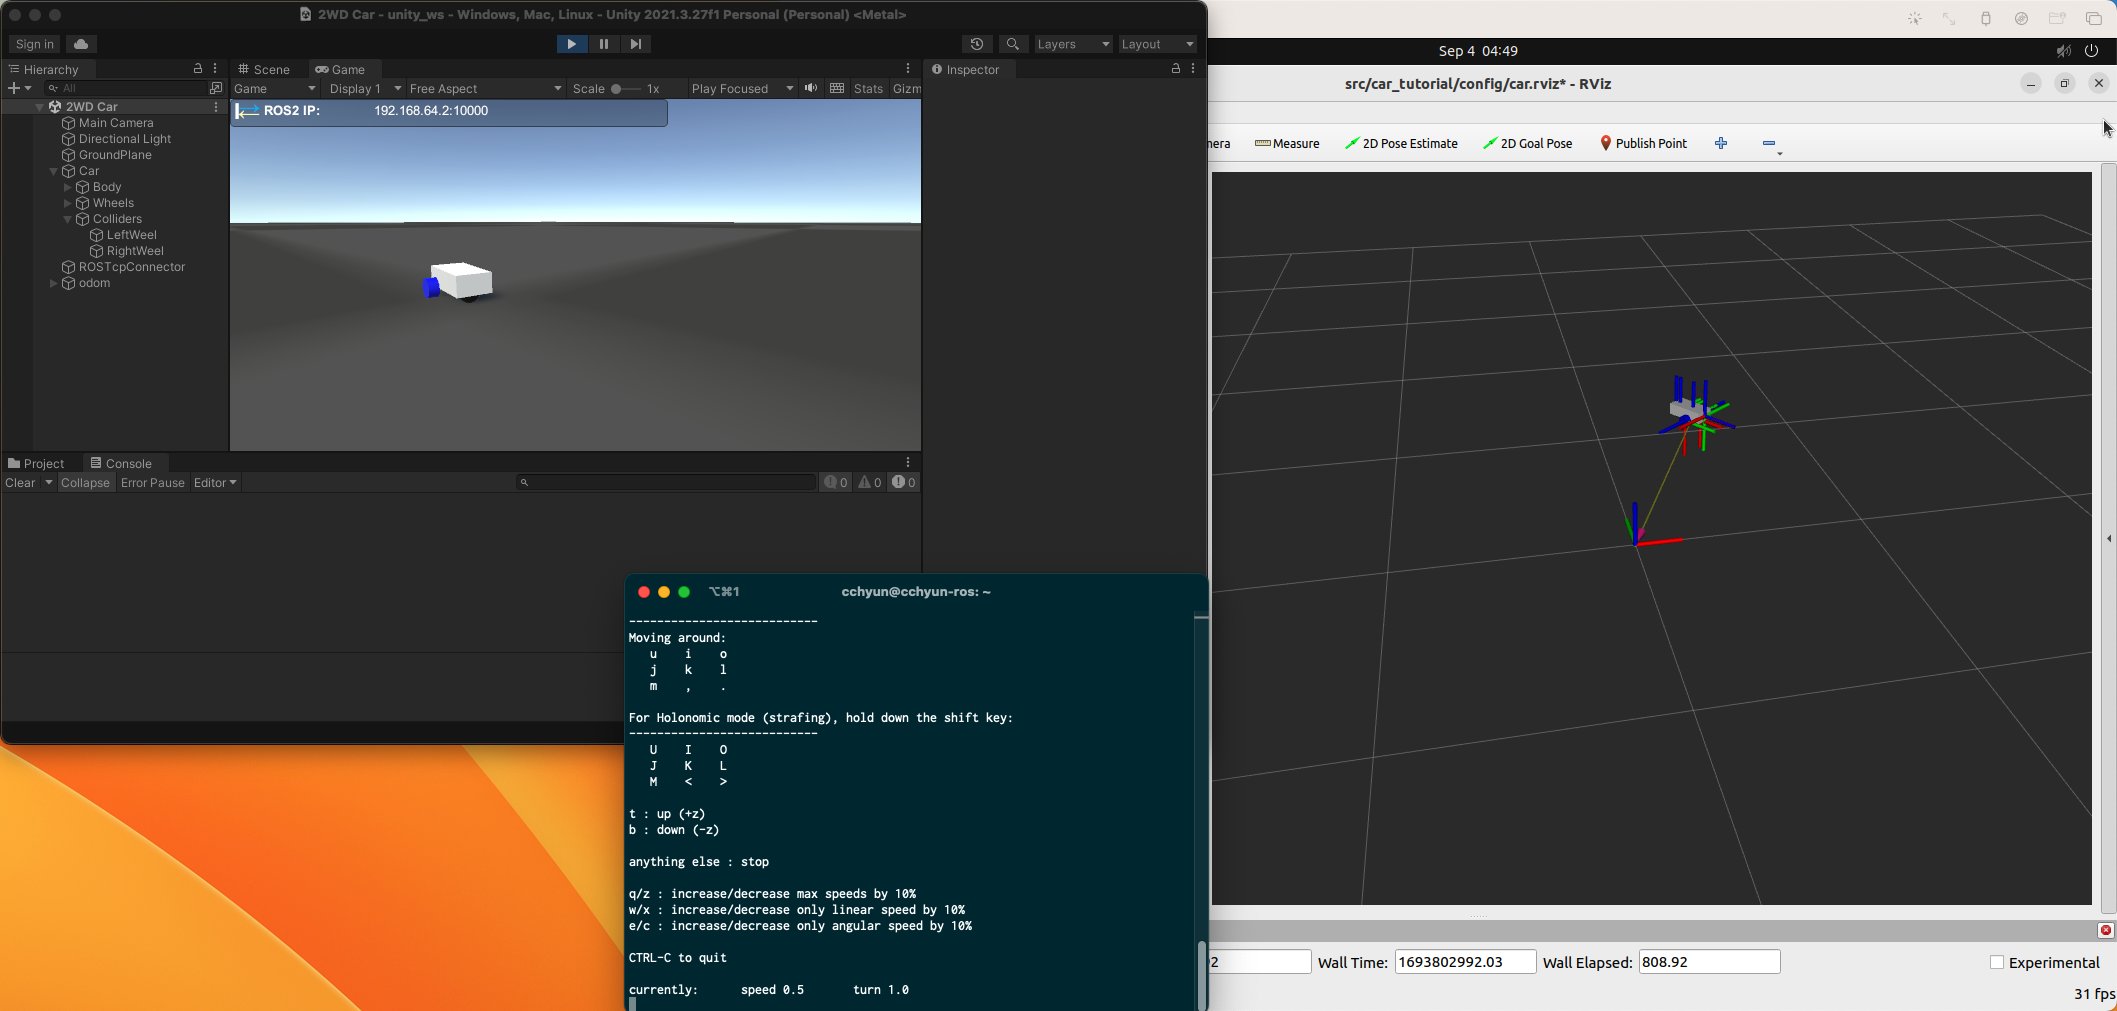
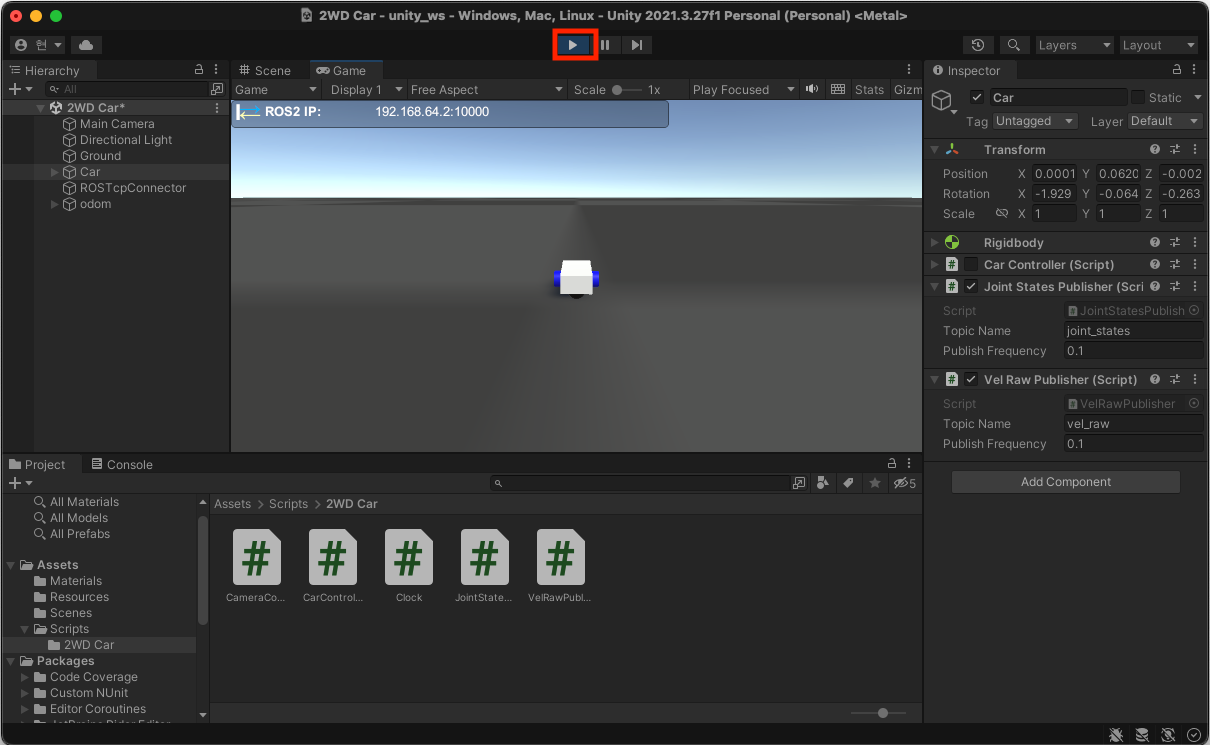
$ ros2 launch car_tutorial unity.launch.py- Unity에서 Play 버튼을 눌러서 실행하면 아래와 같이 파란색 아이콘과 ROS2 연결정보가 출력됩니다. 여기서 파란색 아이콘이 나타나는 이유는 ROS2 서버와 연결이 성공했기 때문입니다.
3. Unity에서 JointStates Topic 발송하기
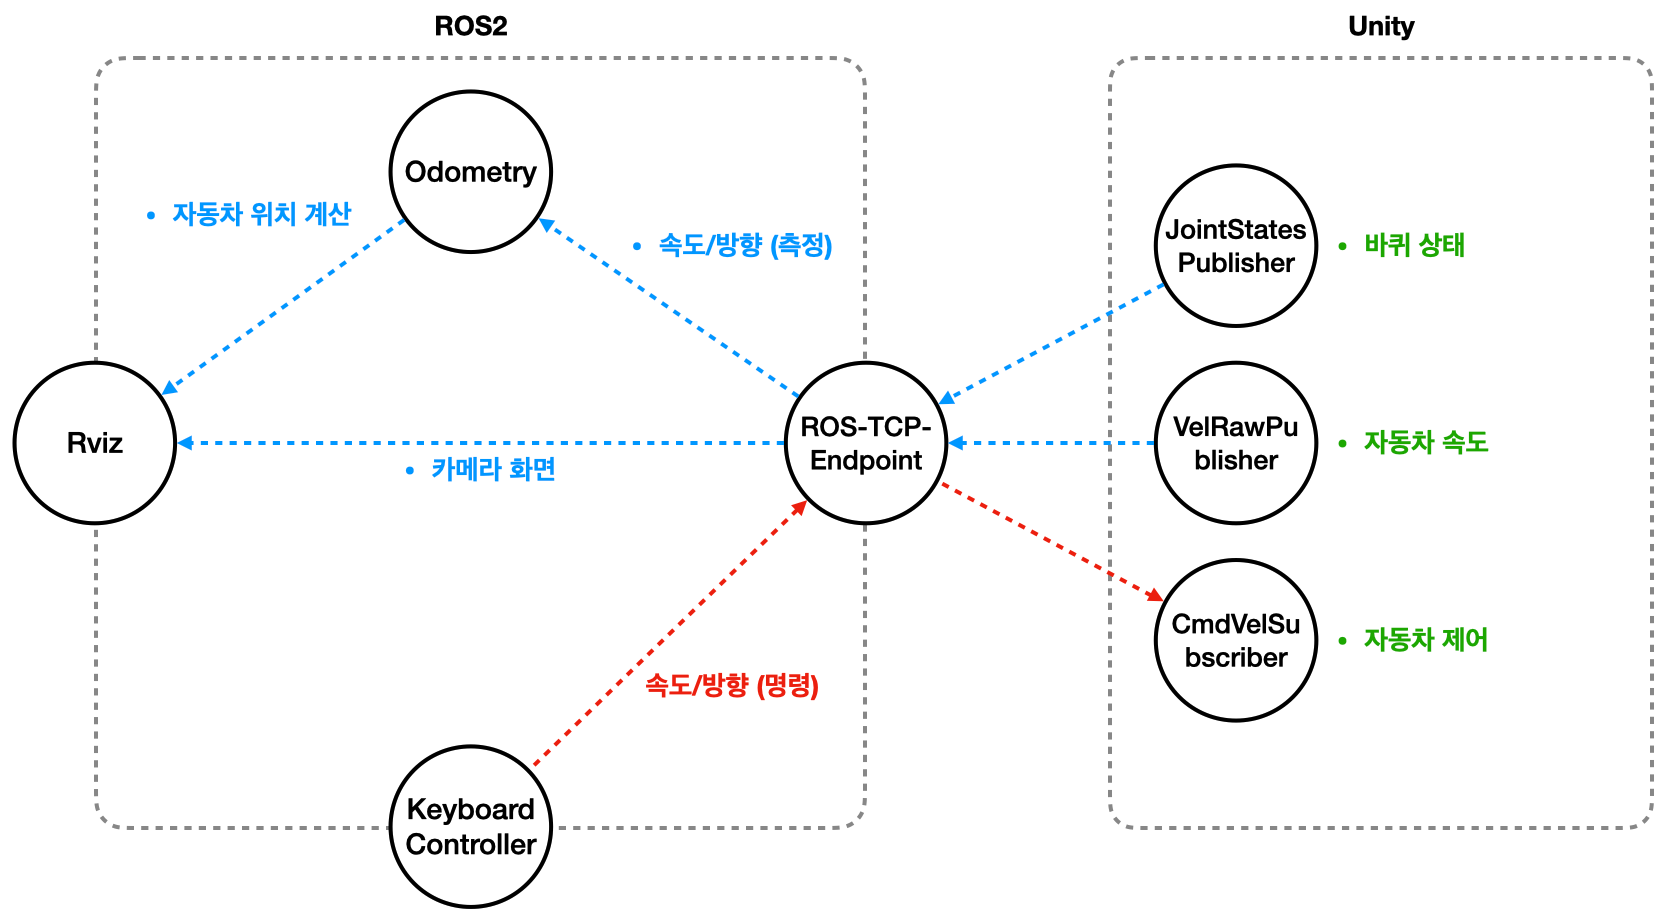
- ROS2와 Unity와는 아래와 같은 구조로 Unity에서 Topic을 Publish 하고 Subscribe 하도록 구성하기 위한 첫 번째 과정입니다.
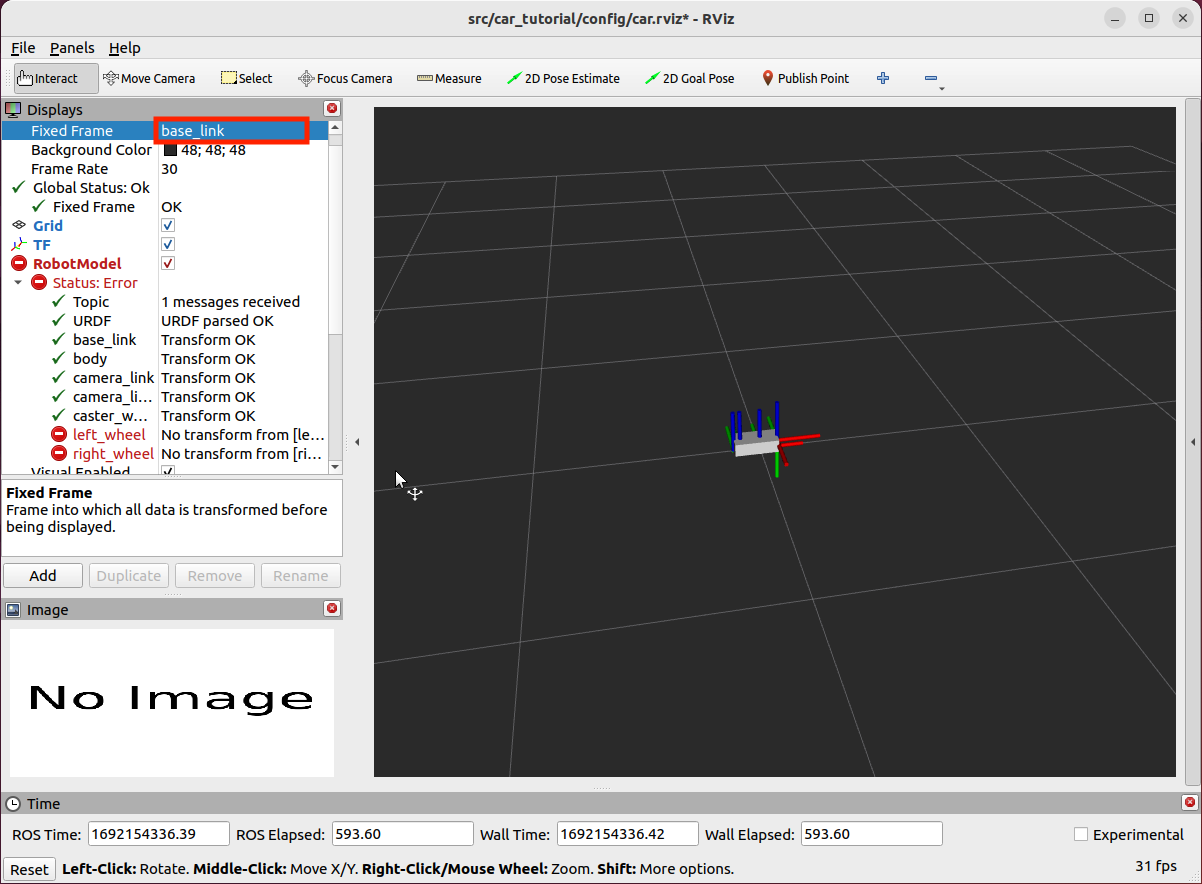
- 이전 과정에서 'unity.launch.py'를 실행했을 때 Rviz 화면은 아래와 같은 오류가 나타납니다. 오류의 원인은 크게 두 가지입니다.
◦ odom 정보를 Unity에서 Publish 하지 않습니다.
◦ Joint States 정보를 Unity에서 Publish 하지 않습니다.

- 'Fixed Frame'을 'base_link'로 변경하면 아래와 같이 odom 관련한 오류가 사라지고 Joint States 관련 오류만 남게 됩니다. 이번 과정에서는 이 문제를 해결해 보겠습니다.
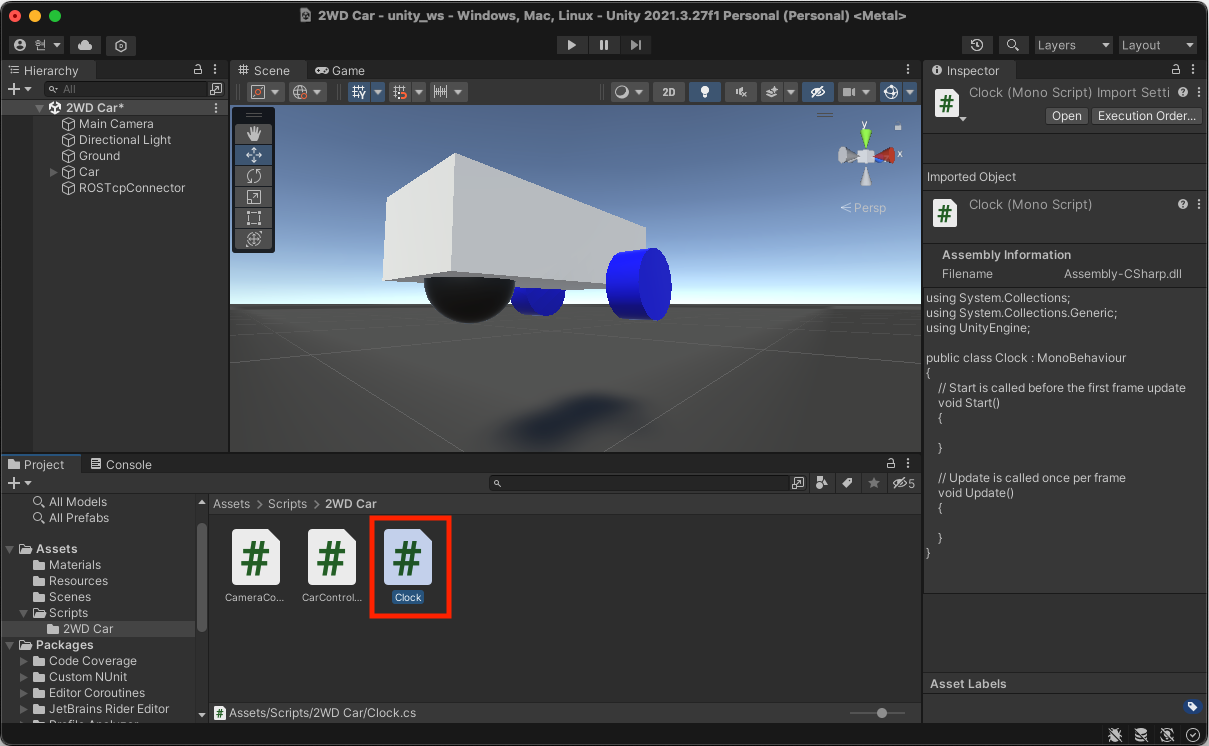
- 'Assets >> Scripts >> 2WD Car' 폴더 아래 'Clock'이라는 Script를 생성하고 내용을 https://github.com/Unity-Technologies/Robotics-Nav2-SLAM-Example/blob/main/Nav2SLAMExampleProject/Assets/Scripts/Clock.cs 파일을 그래도 복사하고 파일의 내용 중 NowTimeInSeconds 부분을 아래와 같이 수정합니다.
        public static double NowTimeInSeconds
        {
            get
            {
                return Mode switch
                {
                    //ClockMode.UnityScaled => Time.timeAsDouble + UnityUnscaledTimeSinceFrameStart * Time.timeScale,
                    ClockMode.UnityScaled => SecondsSinceUnixEpoch,
                    // ClockMode.UnityUnscaled => Time.realtimeSinceStartupAsDouble,
                    // ClockMode.UnixEpoch => SecondsSinceUnixEpoch,
                    _ => throw new NotImplementedException()
                };
            }
        }

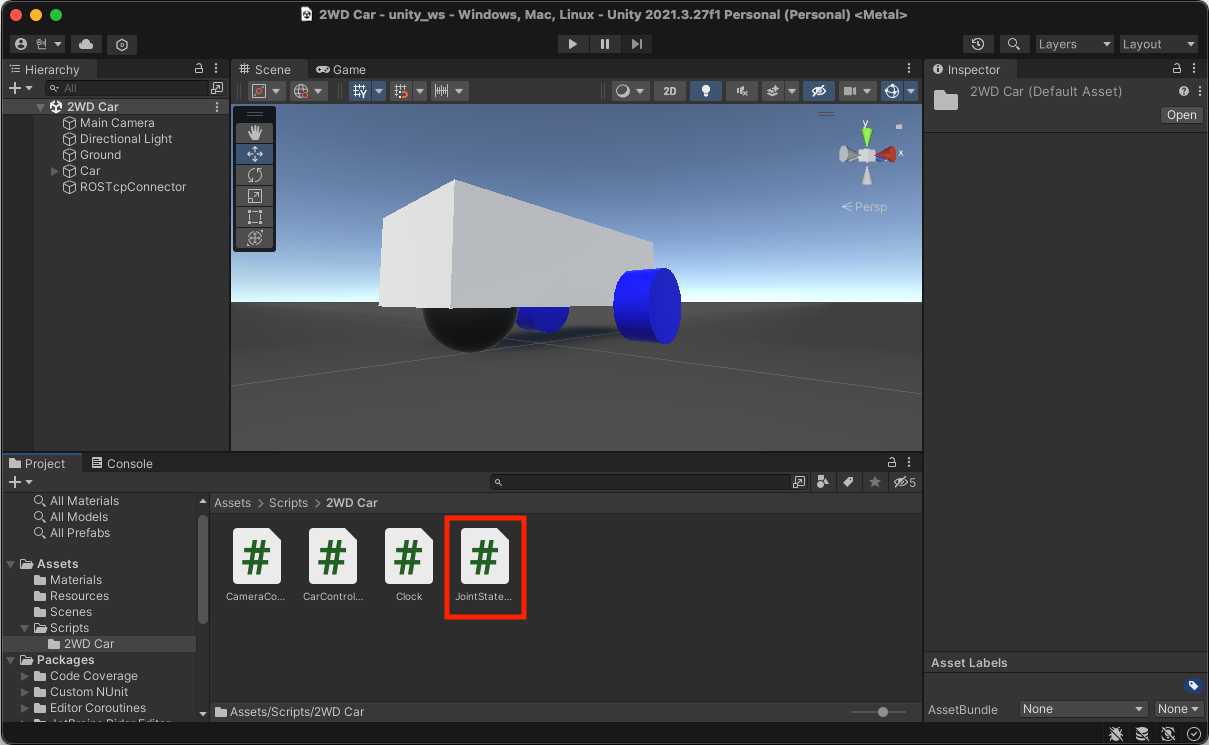
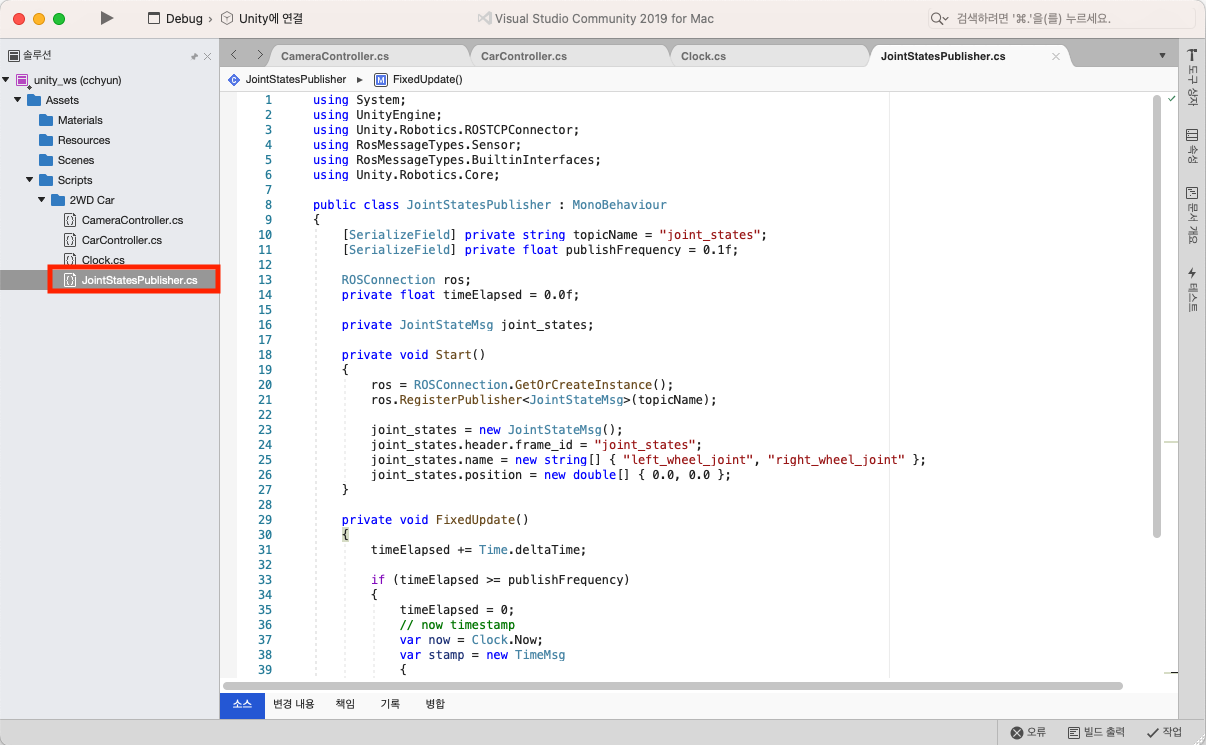
- 'Assets >> Scripts >> 2WD Car' 폴더 아래 'JointStatesPublisher' Script를 생성하고 내용을 아래와 같이 편집합니다.
using System;
using UnityEngine;
using Unity.Robotics.ROSTCPConnector;
using RosMessageTypes.Sensor;
using RosMessageTypes.BuiltinInterfaces;
using Unity.Robotics.Core;

public class JointStatesPublisher : MonoBehaviour
{
    [SerializeField] private string topicName = "joint_states";
    [SerializeField] private float publishFrequency = 0.1f;

    ROSConnection ros;
    private float timeElapsed = 0.0f;

    private JointStateMsg joint_states;

    private void Start()
    {
        ros = ROSConnection.GetOrCreateInstance();
        ros.RegisterPublisher<JointStateMsg>(topicName);

        joint_states = new JointStateMsg();
        joint_states.header.frame_id = "joint_states";
        joint_states.name = new string[] { "left_wheel_joint", "right_wheel_joint" };
        joint_states.position = new double[] { 0.0, 0.0 };
    }

    private void FixedUpdate()
    {
        timeElapsed += Time.deltaTime;

        if (timeElapsed >= publishFrequency)
        {
            timeElapsed = 0;
            // now timestamp
            var now = Clock.Now;
            var stamp = new TimeMsg
            {
                sec = (int)now,
                nanosec = (uint)((now - Math.Floor(now)) * Clock.k_NanoSecondsInSeconds)
            };
            // publish ros topic
            joint_states.header.stamp = stamp;
            ros.Publish(topicName, joint_states);
            // simulate wheel rotate
            joint_states.position[0] += 0.05;
            joint_states.position[1] += 0.05;
        }
    }
}
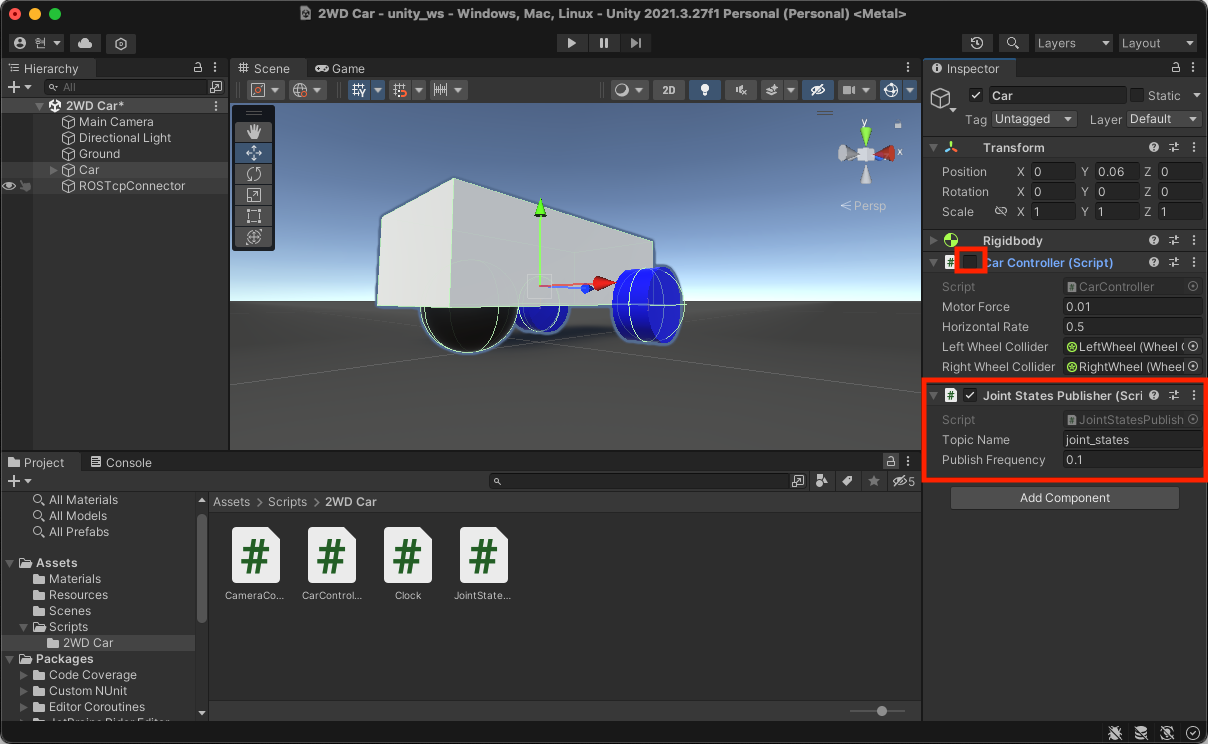
- 'Car' Object에 'Car Controller' script의 체크박스를 해제해서 비활성화하고 'Joint States Publisher' script를 등록합니다.
- Unity에서 Play 버튼을 누릅니다.
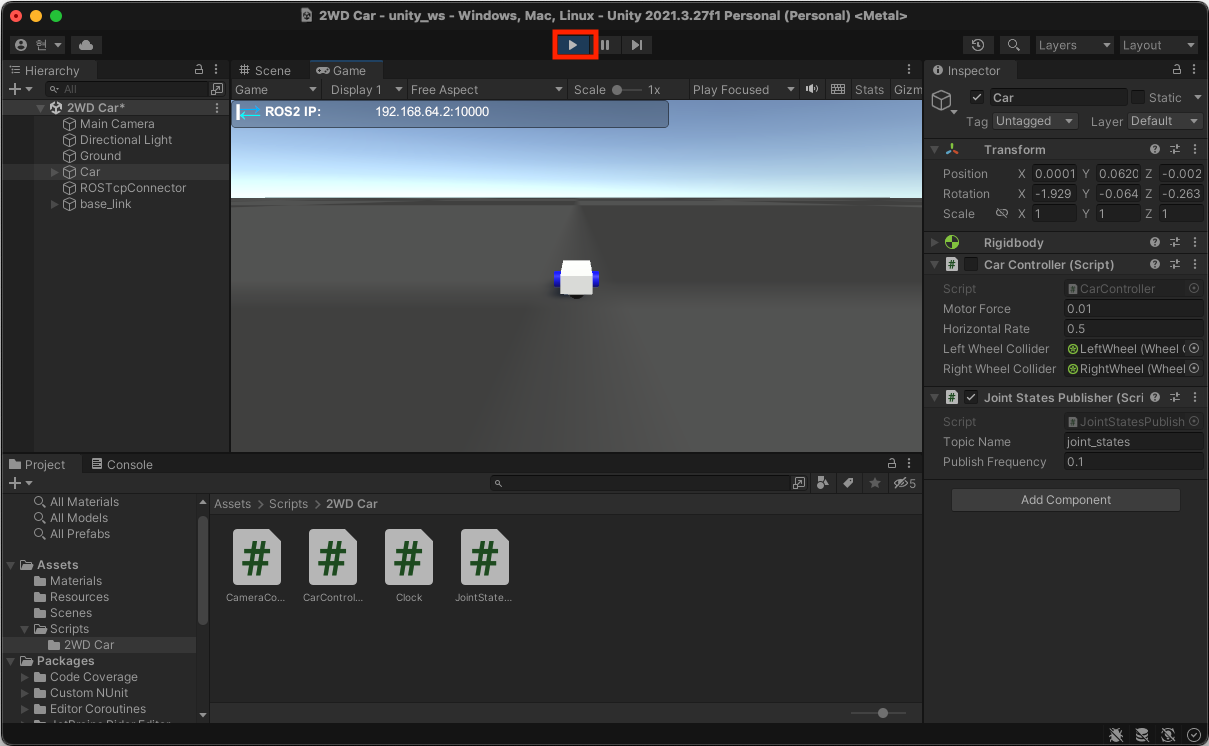
- 아래 그림과 같이 Rviz에서 오류가 사라지고 바퀴가 회전하는 것을 확인할 수 있습니다.
4. Unity에서 VelRaw Topic 발송하기
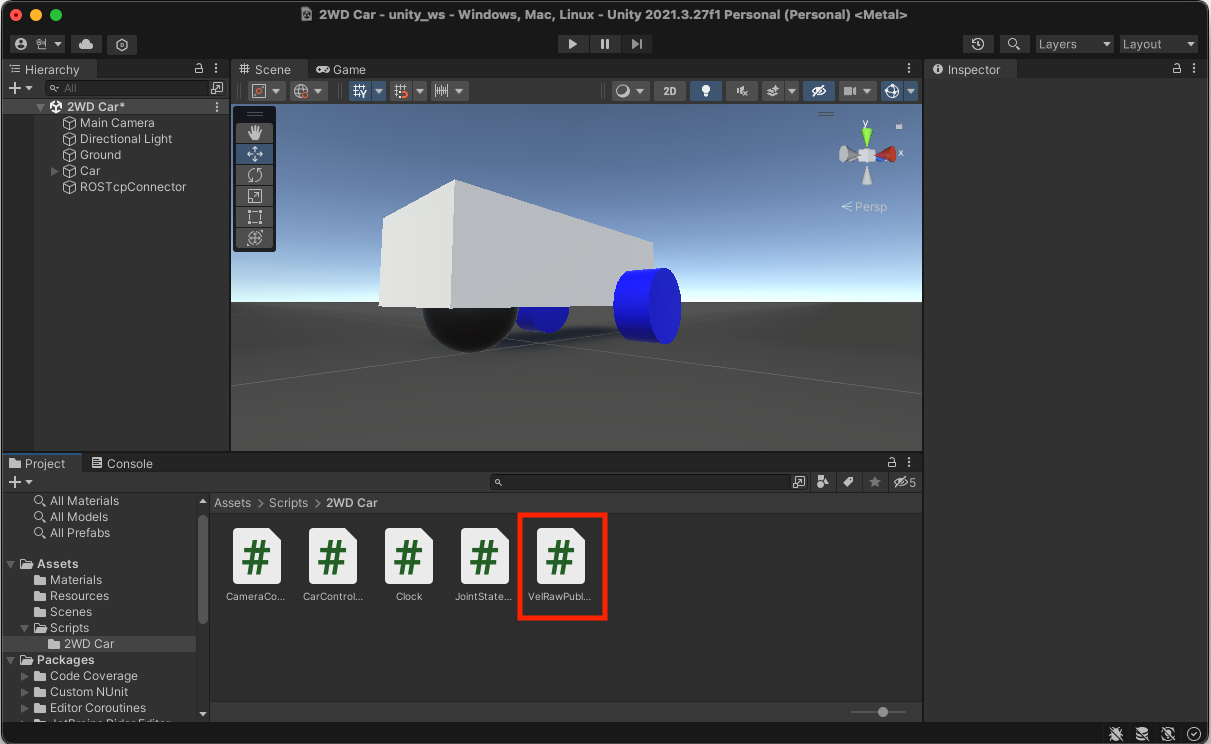
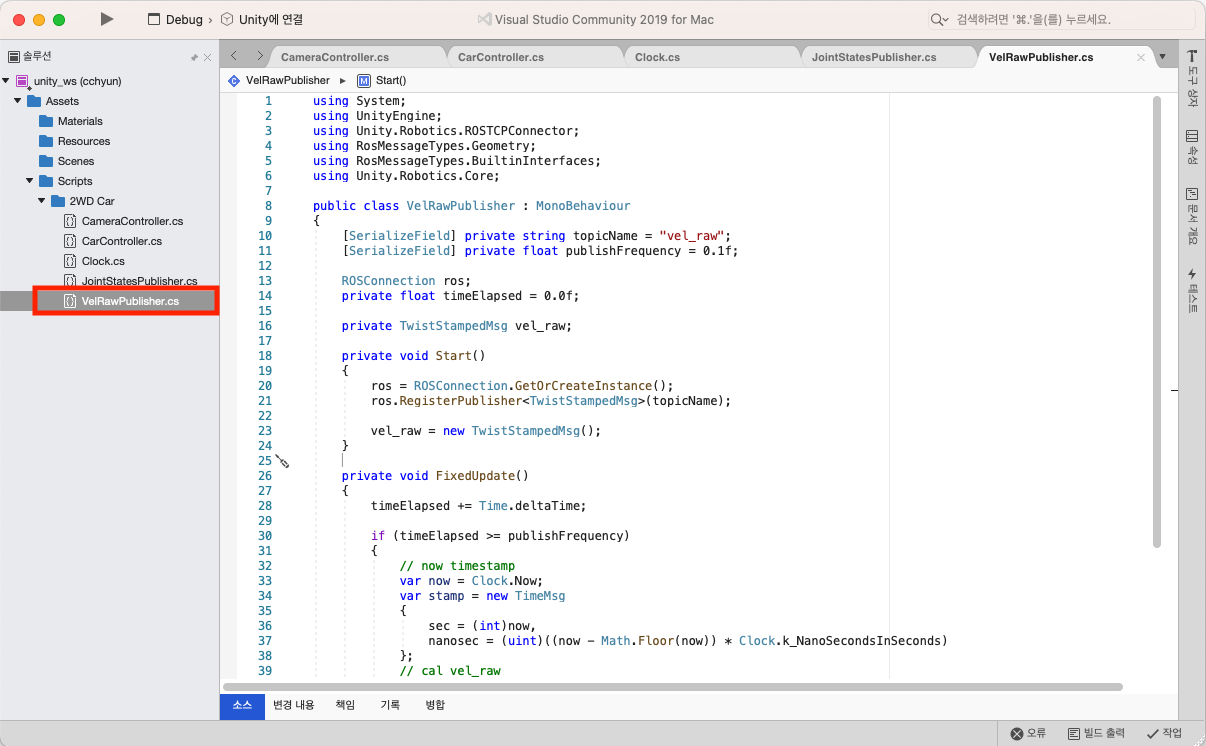
- Unity에서 'Assets >> Scripts >> 2WD Car' 폴더 아래 'VelRawPublisher' Script를 생성하고 내용을 아래와 같이 편집합니다. 자동차 속도를 계산하지는 않고 $(x, y, \theta_z)$ 모두 $(0, 0, 0)$으로 보내는 Script입니다.
using System;
using UnityEngine;
using Unity.Robotics.ROSTCPConnector;
using RosMessageTypes.Geometry;
using RosMessageTypes.BuiltinInterfaces;
using Unity.Robotics.Core;

public class VelRawPublisher : MonoBehaviour
{
    [SerializeField] private string topicName = "vel_raw";
    [SerializeField] private float publishFrequency = 0.1f;

    ROSConnection ros;
    private float timeElapsed = 0.0f;

    private TwistStampedMsg vel_raw;

    private void Start()
    {
        ros = ROSConnection.GetOrCreateInstance();
        ros.RegisterPublisher<TwistStampedMsg>(topicName);

        vel_raw = new TwistStampedMsg();
    }

    private void FixedUpdate()
    {
        timeElapsed += Time.deltaTime;

        if (timeElapsed >= publishFrequency)
        {
            // now timestamp
            var now = Clock.Now;
            var stamp = new TimeMsg
            {
                sec = (int)now,
                nanosec = (uint)((now - Math.Floor(now)) * Clock.k_NanoSecondsInSeconds)
            };
            // cal vel_raw
            vel_raw.twist.linear.x = 0;
            vel_raw.twist.linear.y = 0;
            vel_raw.twist.angular.z = 0;
            // init timeElapsed
            timeElapsed = 0;
            // publish ros topic
            vel_raw.header.stamp = stamp;
            ros.Publish(topicName, vel_raw);
        }
    }
}
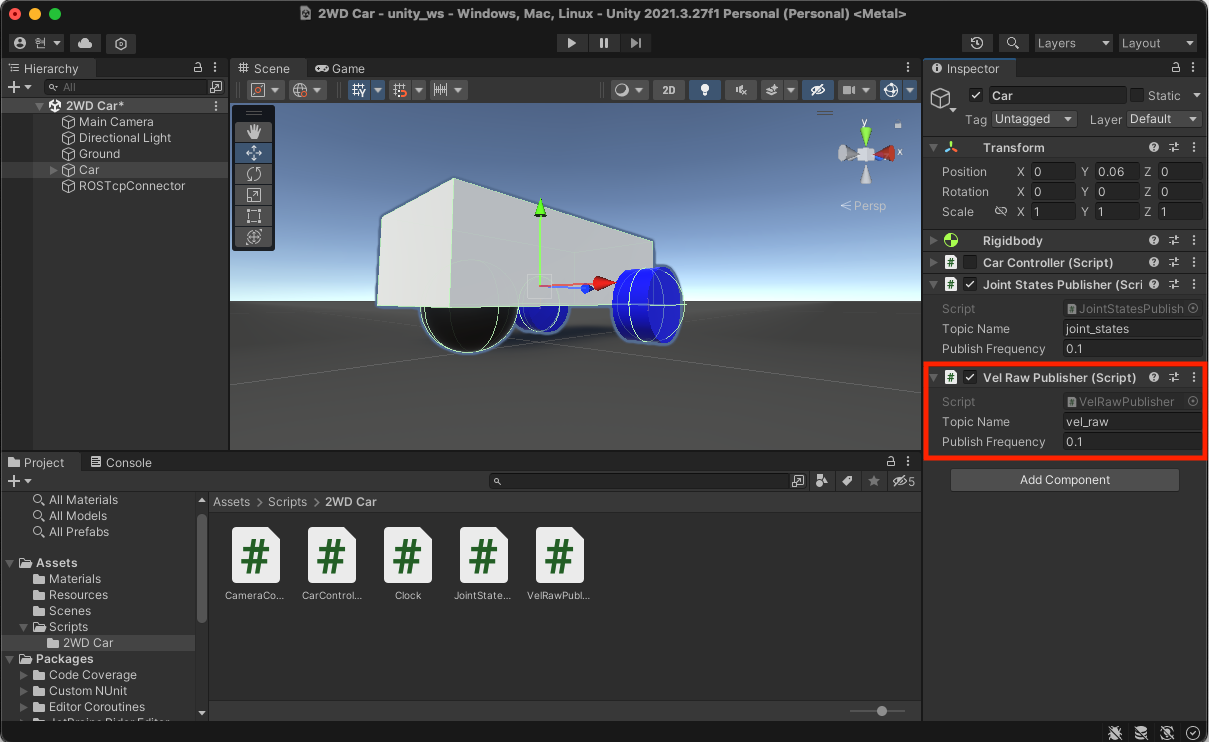
- 'Car' Object에 'Vel Raw Publisher' script를 등록합니다.
- Unity에서 Play 버튼을 누릅니다.
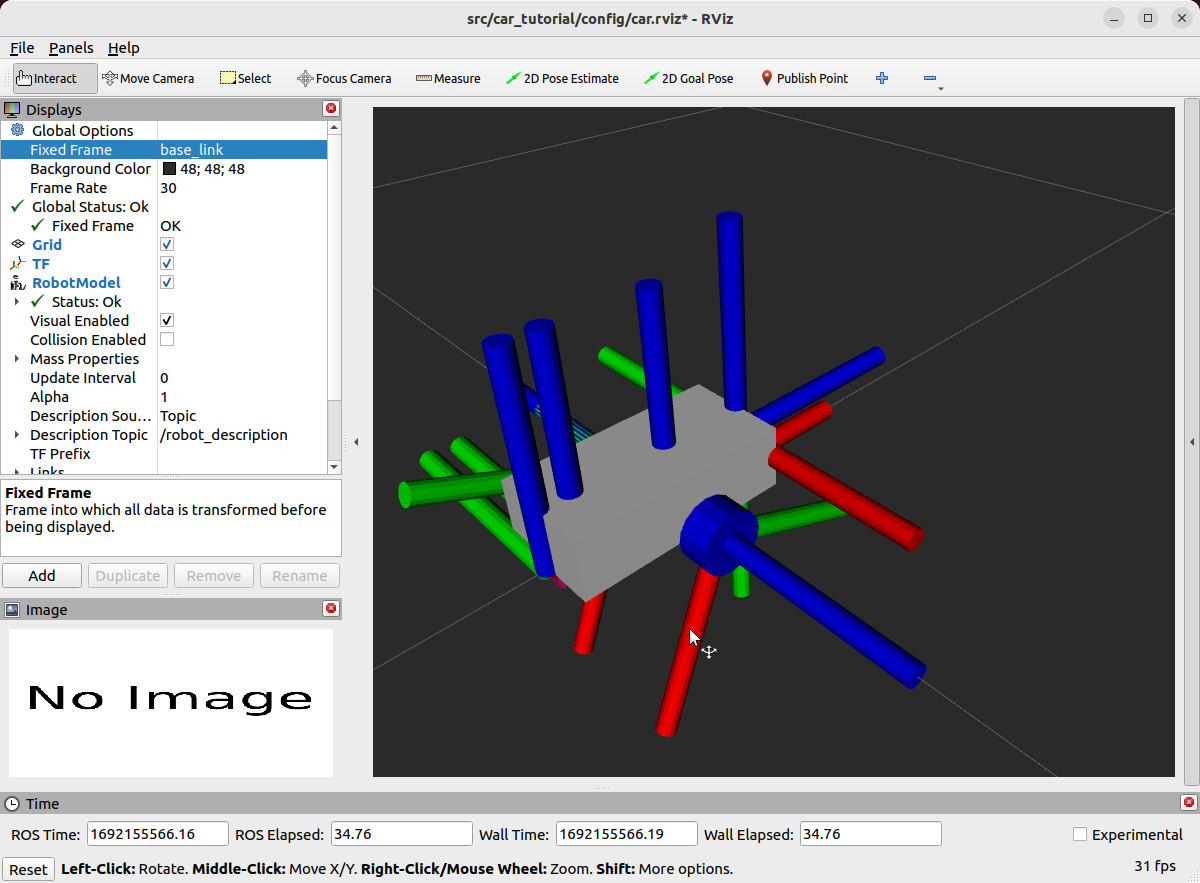
- Rviz에서 'Fixed Frame'을 'odom'으로 변경해도 오류가 발생하지 않습니다.

5. ROS에서 Key보드로 Unity 자동차 조종하기
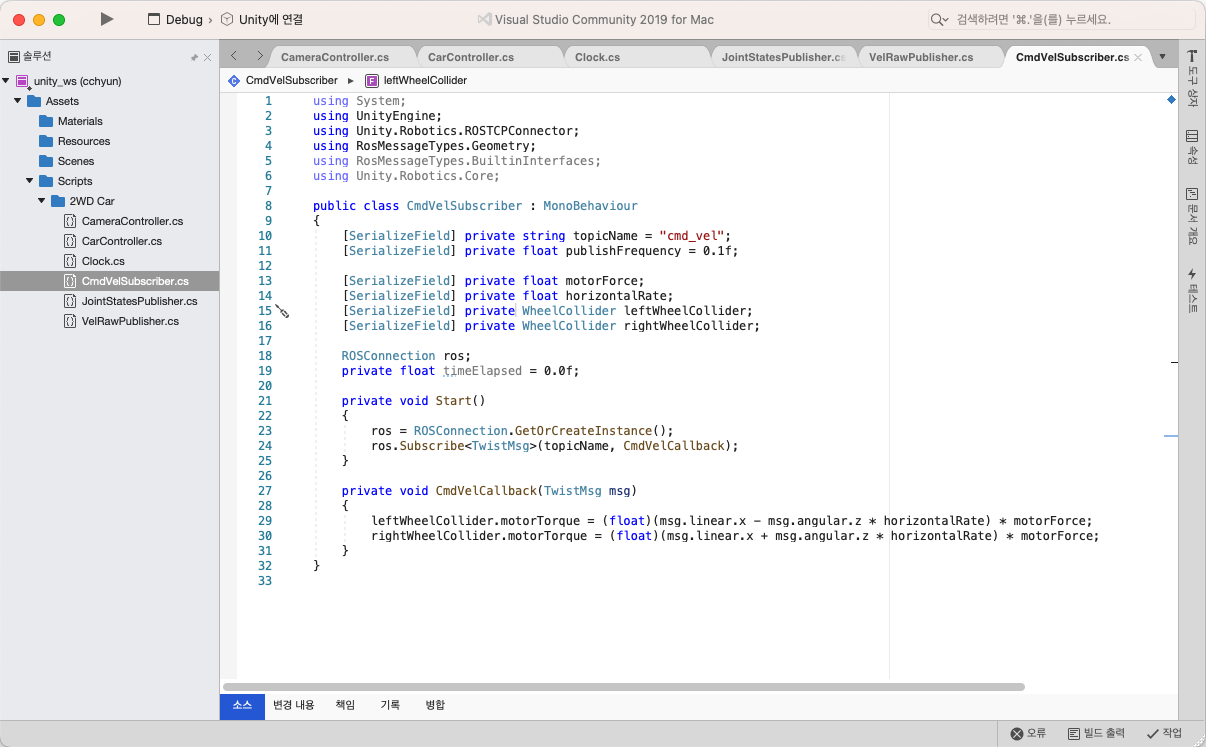
- Unity에서 'Assets >> Scripts >> 2WD Car' 폴더 아래 'CmdVelSubscriber' Script를 생성하고 내용을 아래와 같이 편집합니다.
using System;
using UnityEngine;
using Unity.Robotics.ROSTCPConnector;
using RosMessageTypes.Geometry;
using RosMessageTypes.BuiltinInterfaces;
using Unity.Robotics.Core;

public class CmdVelSubscriber : MonoBehaviour
{
    [SerializeField] private string topicName = "cmd_vel";
    [SerializeField] private float publishFrequency = 0.1f;

    [SerializeField] private float motorForce;
    [SerializeField] private float horizontalRate;
    [SerializeField] private WheelCollider leftWheelCollider;
    [SerializeField] private WheelCollider rightWheelCollider;

    ROSConnection ros;
    private float timeElapsed = 0.0f;

    private void Start()
    {
        ros = ROSConnection.GetOrCreateInstance();
        ros.Subscribe<TwistMsg>(topicName, CmdVelCallback);
    }

    private void CmdVelCallback(TwistMsg msg)
    {
        leftWheelCollider.motorTorque = (float)(msg.linear.x - msg.angular.z * horizontalRate) * motorForce;
        rightWheelCollider.motorTorque = (float)(msg.linear.x + msg.angular.z * horizontalRate) * motorForce;
    }
}
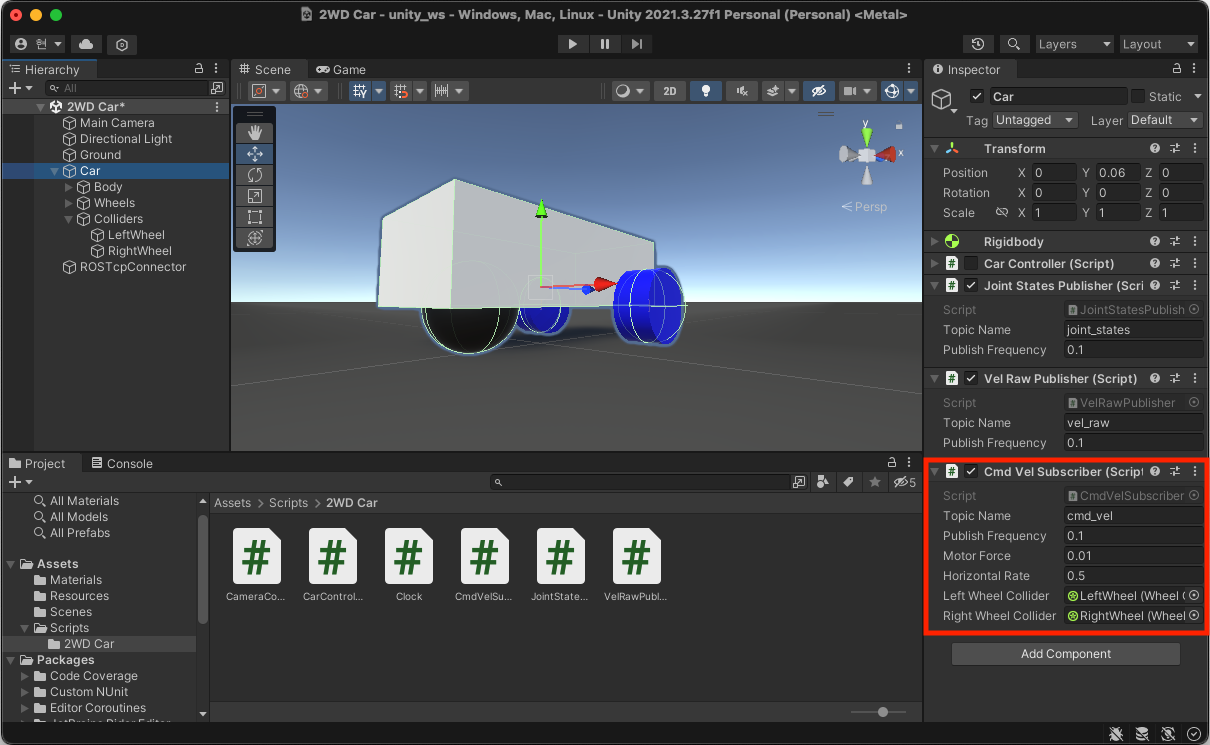
- 'Car' Object에 'Cmd Vel Subscriber' script를 등록하고 아래 내용을 설정합니다.
◦ Mortor Force: 0.01
◦ Horizontal Rage: 0.5
◦ Left Weel Collider: LeftWheel Object
◦ Right Wheel Collider: RightWheel Object
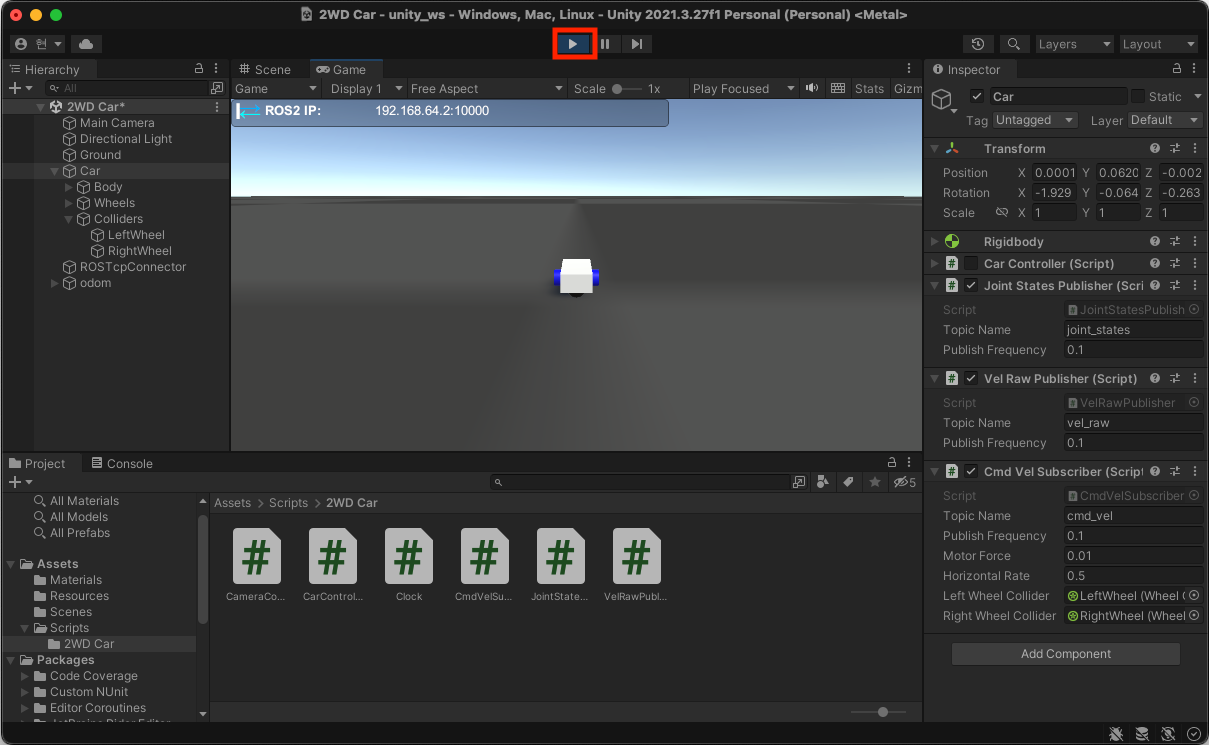
- Unity에서 Play 버튼을 누릅니다.
- 터미널에서 아래 명령을 실행합니다.
$ ros2 run teleop_twist_keyboard teleop_twist_keyboard- 터미널에서 키를 입력하면 Unity의 자동차가 움직이는 것을 확인할 수 있습니다.

6. Unity에서 자동차 움직임을 Rivz에 표현하기
- Unity에서 'Assets >> Scripts >> 2WD Car' 폴더 아래 'VelRawPublisher' Script 내용을 아래와 같이 편집합니다.
기존에 모두 0을 보내던 코드를 선속도와 각속도를 계산해서 ROS에 전달하는 코드가 추가했습니다.
using System;
using UnityEngine;
using Unity.Robotics.ROSTCPConnector;
using RosMessageTypes.Geometry;
using RosMessageTypes.BuiltinInterfaces;
using Unity.Robotics.Core;

public class VelRawPublisher : MonoBehaviour
{
    [SerializeField] private string topicName = "vel_raw";
    [SerializeField] private float publishFrequency = 0.1f;

    ROSConnection ros;
    private float timeElapsed = 0.0f;

    private TwistStampedMsg vel_raw;
    private Vector3 prev_position;
    private Quaternion prev_rotation;

    private void Start()
    {
        ros = ROSConnection.GetOrCreateInstance();
        ros.RegisterPublisher<TwistStampedMsg>(topicName);

        vel_raw = new TwistStampedMsg();
    }

    private void FixedUpdate()
    {
        timeElapsed += Time.deltaTime;

        if (timeElapsed >= publishFrequency)
        {
            if (prev_position == null || prev_rotation == null)
            {
                prev_position = transform.position;
                prev_rotation = transform.rotation;
                timeElapsed = 0;
                return;
            }
            // now timestamp
            var now = Clock.Now;
            var stamp = new TimeMsg
            {
                sec = (int)now,
                nanosec = (uint)((now - Math.Floor(now)) * Clock.k_NanoSecondsInSeconds)
            };
            // cal val
            Vector3 distance = transform.position - prev_position;
            float angle = Quaternion.Angle(transform.rotation, prev_rotation);
            // cal vel_raw
            vel_raw.twist.linear.x = distance.z / timeElapsed;
            vel_raw.twist.linear.y = 0;
            vel_raw.twist.angular.z = angle * Mathf.Deg2Rad / timeElapsed;
            // init values
            prev_position = transform.position;
            prev_rotation = transform.rotation;
            timeElapsed = 0;
            // publish ros topic
            vel_raw.header.stamp = stamp;
            ros.Publish(topicName, vel_raw);
        }
    }
}- 터미널에서 아래 명령을 실행합니다.
$ ros2 run teleop_twist_keyboard teleop_twist_keyboard- 터미널에서 키를 입력하면 Unity의 자동차가 움직이는 것과 Rviz에서 자동차가 움직이는 것을 확인할 수 있습니다.
확인해 보니 Unity에서 자동차 움직임과 Rviz에서 자동차 움직임이 차이가 있는 것으로 보입니다.
이후 좀 더 정밀하게 튜닝된 내용을 추가하도록 하겠습니다.